According to the latest research, over 71 per cent of British males do not own a toolbox. Or even at least two power tools. Dubbed the ‘less-skilled generation’ British homeowners would struggle to fit an internal door. In fact, they are increasingly turning to professional contractors to complete their everyday DIY tasks.
From removing radiators to wiring plugs. These days, builders complete many tasks, traditionally done by the homeowner. The self-build market continues to increase in popularity, currently comprising between 7-10% of all UK property constructions. Many individuals are designing and leading the building of their own homes. However, they do not possess the skills to complete the build themselves.
Installers, therefore, have to work on large-scale projects. Such as the completion of an entire house rather than a single room. Forcing them to specialise in a wider range of skills.
Tasks such as fitting an internal door can prove impossible for homeowners. This is largely due to the fact a house has quite a few doors. Also, they do not have the time or capability to install them. As they turn to professionals to complete these jobs, there are some things installers need to consider.
So below are our top tips to fit a door:
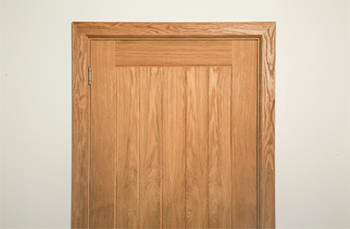
Interior doors usually come in four different sizes – 610mm, 686mm, 767mm and 838mm, all in keeping with standard door sizes. Therefore, only a small amount needs trimming off in order for them to fit.
(Always check the instructions that come with the doors before starting).
If replacing a door, use the same-sized hinges and position them in the same place as previously used.
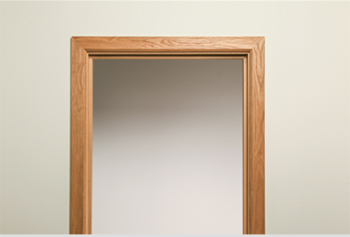
Remove the old door in the first instance. The aim is to replace the existing door, with a new door of the same thickness. If the thickness is different, the doorstop position will need adjusting.
Position the new door in the door frame. If the doors are too big, mark the top of the door frame on the door height. Transfer this measurement to the bottom of the door. Add 3mm taking into account the finished level of the floor. Draw a straight line across the door on both sides. Depending on the amount, either saw or plane off the excess.
Position the new door back in the frame again and this time check the width. There should be 3mm gaps along both sides. If the door is too big mark the door to the required size. Reduce both sides equally using a plane.
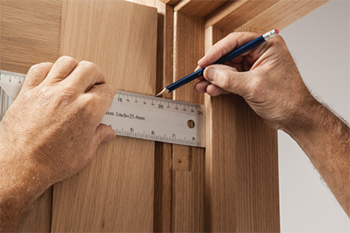
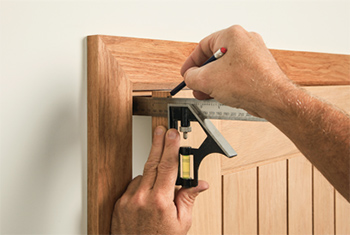
Reposition the new door in the frame. Mark the exact position of the old hinges onto the new door edge. Ensure there is a 3mm gap around all sides.
Next lay the door on its side and use the marks to position the hinges. Draw round the hinges and also mark the hinge thickness on the front edge of the door as well. Alternatively, rather than making hinge markings as in Step 4. lay down the old door next to the new door. Then, transfer the hinge position across as in the picture above.
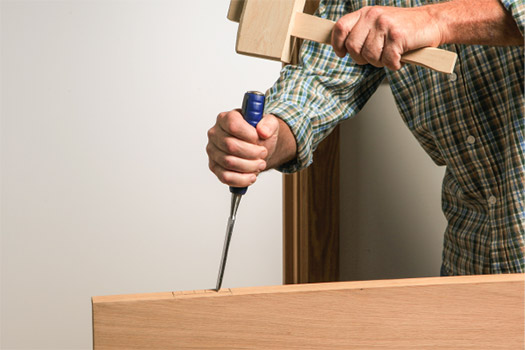
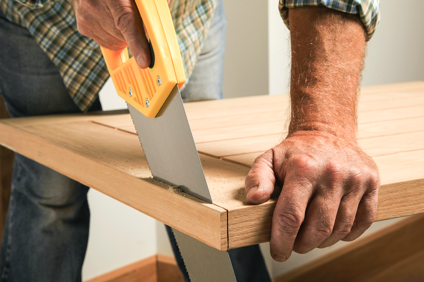
Once the markings for the hinges are in place, use a chisel to cut along the pencil markings.
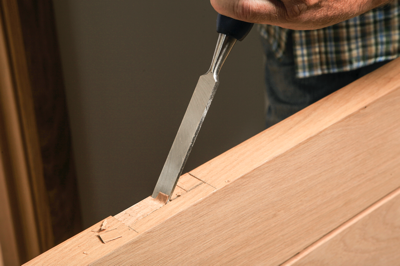
Make several cuts 5mm apart in the marked hinge area as this stops the wood from splitting. Use the chisel flat side down and tap it to remove the wood from the new hinge recess.
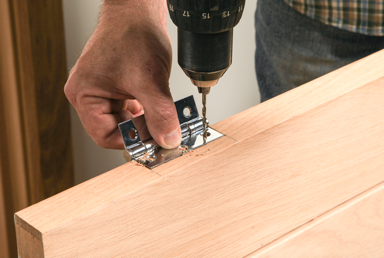
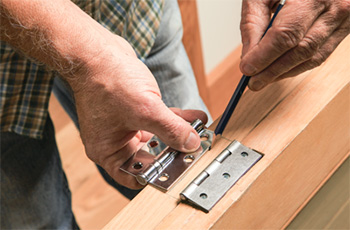
After all the wood is removed from the hinge recess area, hold each hinge in place. Mark screw holes using a drill. A 2-3mm bit is ideal for this.
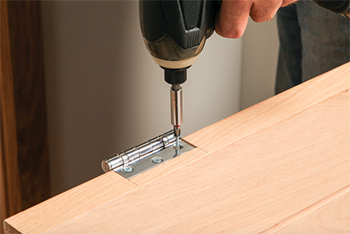
Screw the hinges in place on the doors.
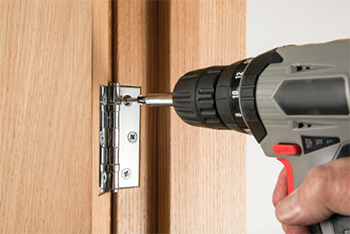
Fit the other half of the hinge in the existing hinge marks on the door frame and screw it into place. Get someone to hold the door in place as you screw the hinges in. If you’re not using the existing hinge positions, the standard positioning on a door edge is 15cm down from the top and 22.5cm up from the bottom.
With hanging now complete, it will be time to add on door handles and catches.
If you follow these step-by-step instructions you’ll be well on your way. Equipped with this knowledge you’ll be a door-hanging guru in no time. Check out the rest of our blog for more helpful DIY-related advice and good luck!
Cheshire Mouldings is one of the UK’s leading timber manufacturers, including stairparts, decking, mouldings, joinery and stair cladding. Recently ISO 9001:2015 certified, the manufacturer provides the highest quality products and after-sales support, with exclusive online resources including installation information and videos.

